A short cut to
Roman letters
Miriam Stribley gives a basic grounding in historic
letterforms to students she teaches on two ba graphic
design courses. Initially she only has these students for
five days, so she has developed a simplified and
effective way of teaching Roman capitals.
Any broad edged tool can be used to construct the
letters: a carpenter's pencil, a piece of balsa wood or a
large nib. The serifs are drawn in afterwards.
Holding the implement at 30° gives the correct
weight of thick and thin stroke to the classical Roman
letters, providing they are drawn 9/10 nib-widths high.
Angle 30°, thickness of stroke 1/10 height, Serif 1/4 of
circle.
Q
2.
n
-
D
J.
26
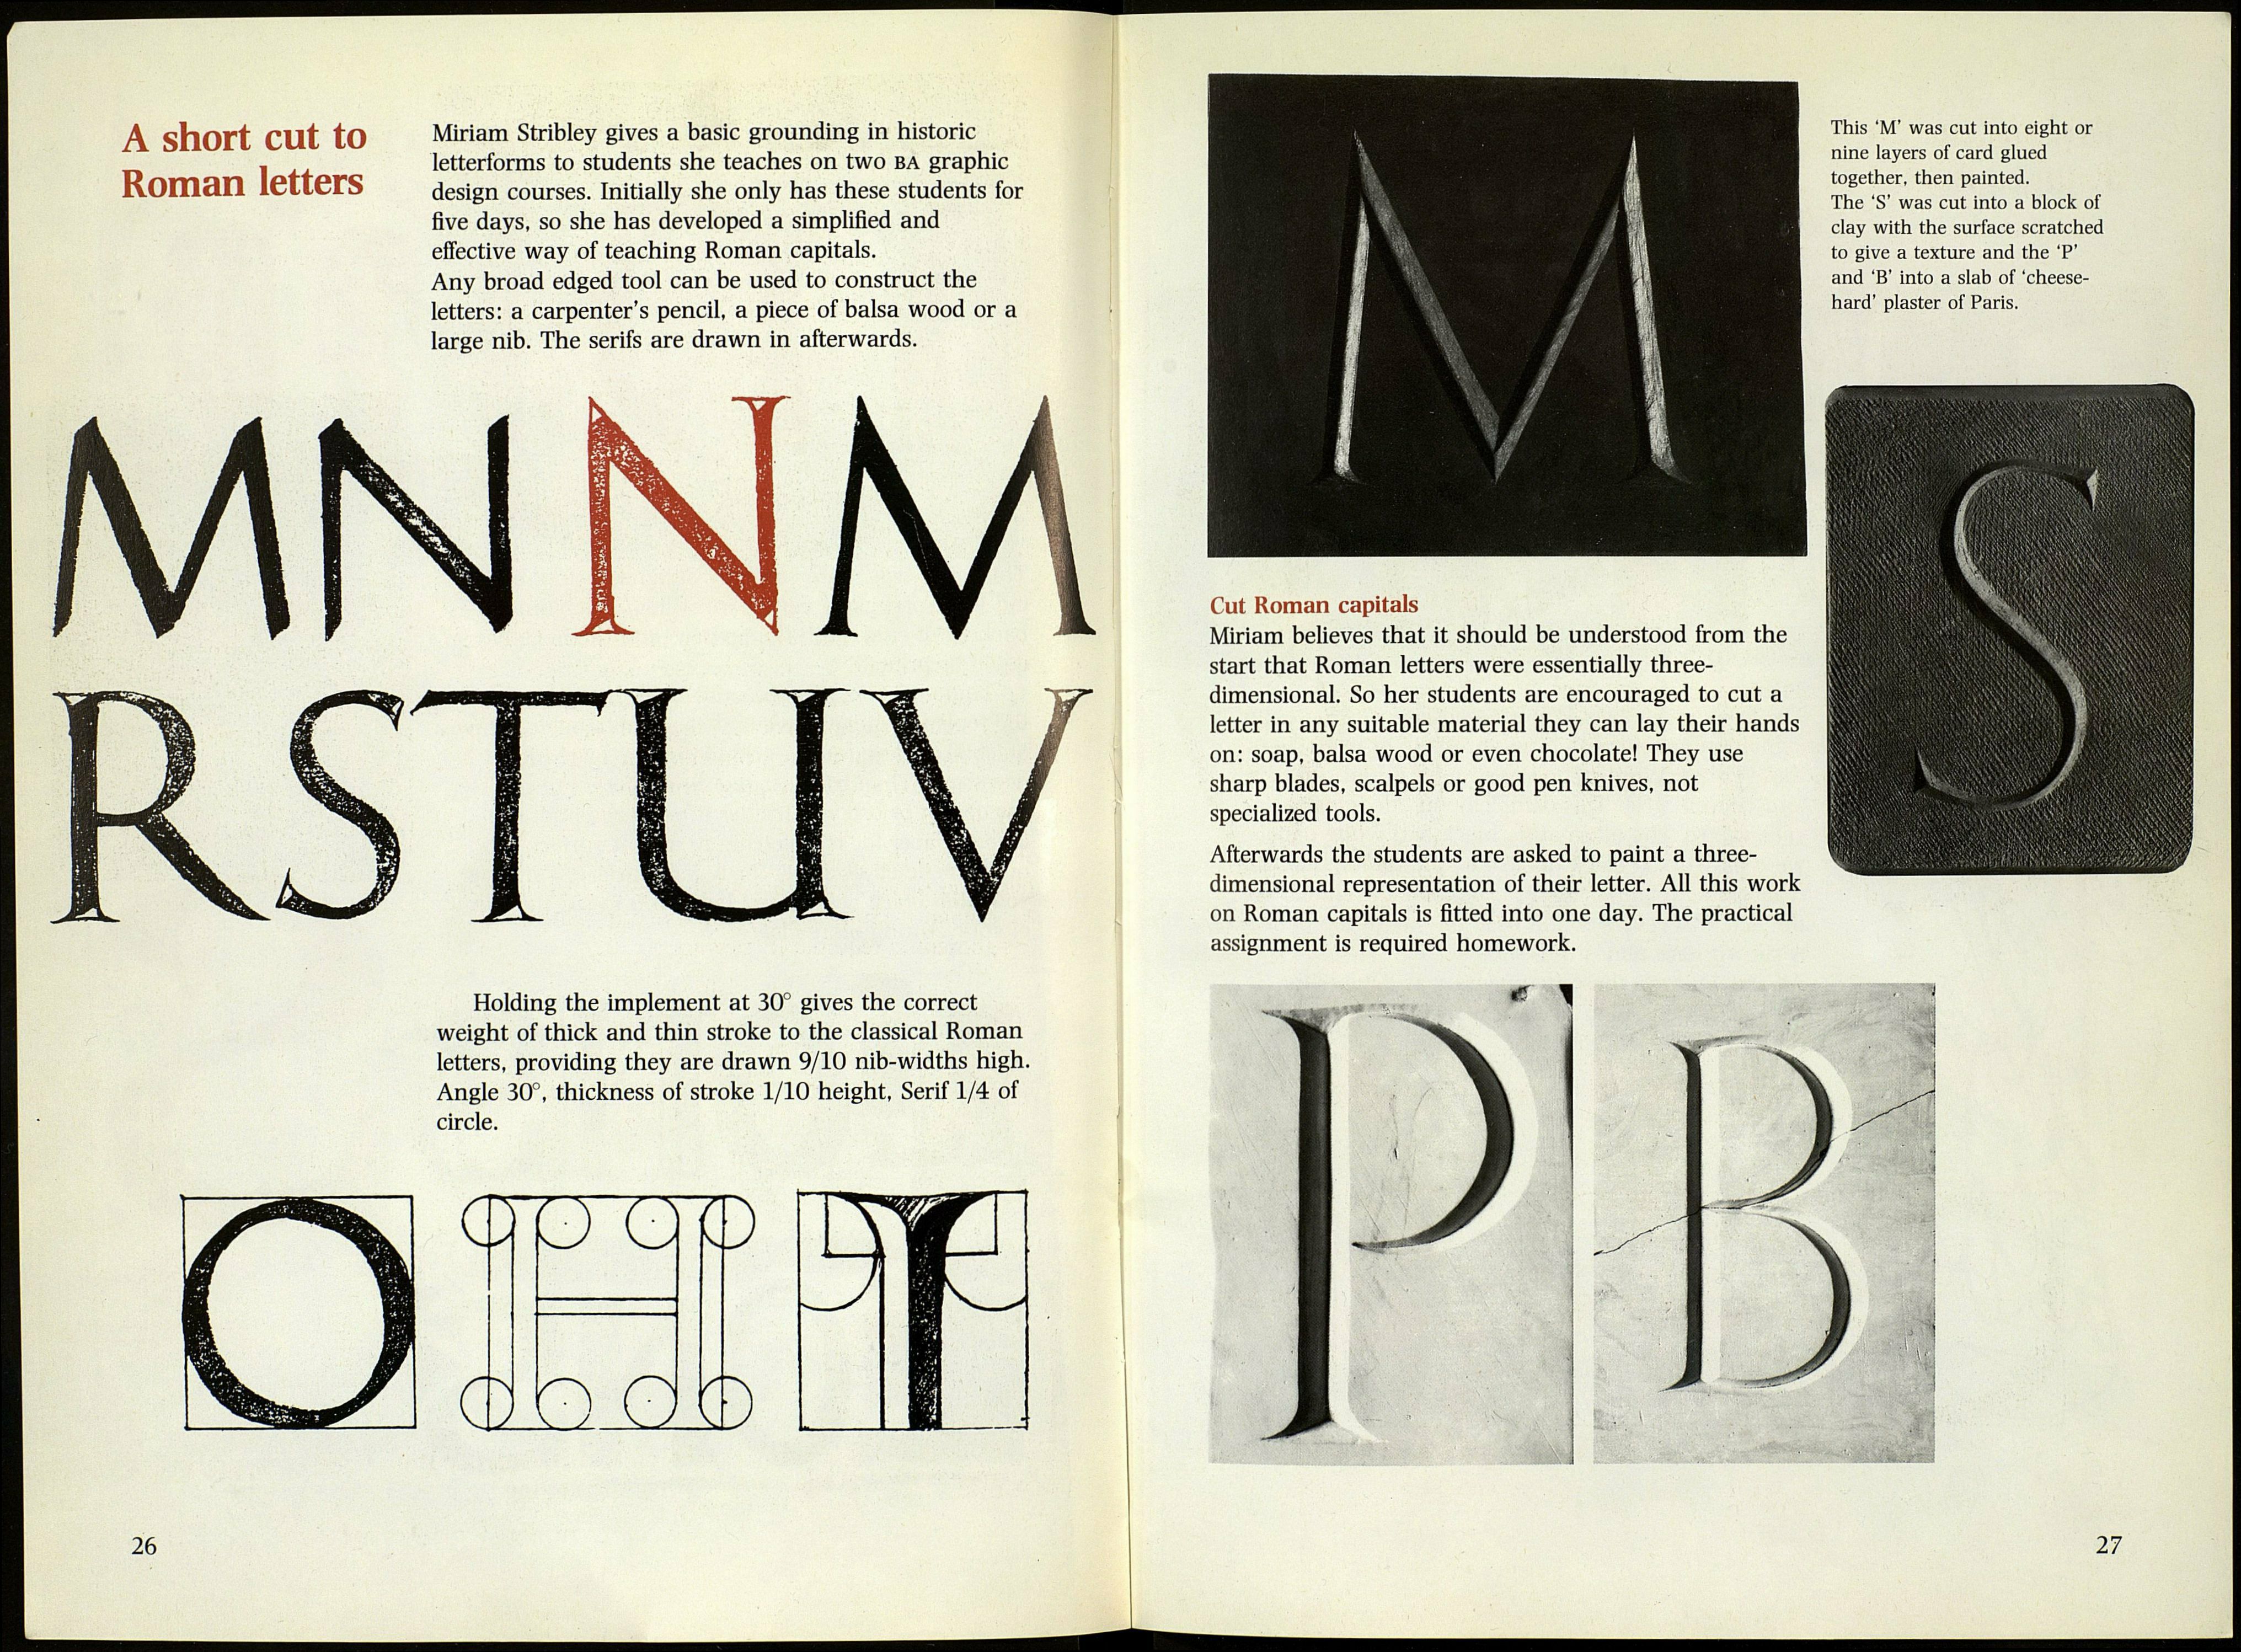
This 'M' was cut into eight or
nine layers of card glued
together, then painted.
The 'S' was cut into a block of
clay with the surface scratched
to give a texture and the 'P'
and 'B' into a slab of 'cheese-
hard' plaster of Paris.
Cut Roman capitals
Miriam believes that it should be understood from the
start that Roman letters were essentially three-
dimensional. So her students are encouraged to cut a
letter in any suitable material they can lay their hands
on: soap, balsa wood or even chocolate! They use
sharp blades, scalpels or good pen knives, not
specialized tools.
Afterwards the students are asked to paint a three-
dimensional representation of their letter. All this work
on Roman capitals is fitted into one day. The practical
assignment is required homework.
* 1
27